Wednesday, September 1, 2021

Another Box Top sleeve hack! Add a ribbed cuff.

 The change of seasons always makes me look at the clothes in my wardrobe and think about what it is I no longer wear, and what I'd like to wear.

Sometimes, I add a garment, and find a gap for something to wear with that new thing.

And sometimes, it's a chance look at some fabric and notions I already have in my stash, and this sparks a thought for a possibility.

And so it was for a length of very nice plaid linen. I had been contemplating what kind of top I wanted from this fabric, but it wasn't until I happened accross a small piece of cuff ribbing I had left over from another project that I thought perhaps a cuffed short sleeve to a Box Top would be just the ticket.


So, this is a super easy sleeve hack for the Box Top. 

Begin by following the instructions for the cuff sleeve hack (find that HERE) starting at step 1 and continue until you've finished step 4.

Now we'll add the rib to your short sleeve!

Cut the rib about 2/3 of the width of the cuff sleeve. Calculate this by dividing the width of your cuff by 3, then mulitply that by 2.

For example, if your cuff sleeve is 48cm wide, then divide by 3 = 16cm, now multiply by 2 = 32cm.

32cm becomes the length of your rib.

Now pin your rib to the cuff sleeve, right sides together.

Stretch the rib as you go to make it fit your cuff sleeve, making sure the stretch is evenly distributed.

Now, stitch the rib to the cuff sleeve, stretching out the rib as you go.


Finish the seam allowance with either an overlocker, or with a zig zag stitch.


Now sew your top front, back and sleeves together following the cuff sleeve instructions 5, 6, 7 & 8.

And that is that!

Continue with your top as per your Box Top pattern instructions, and you'll have a lovely new top to wear with all your favourite seperates.

Enjoy!

Thursday, May 23, 2019

Box Top pattern hacks. Add a three quarter elastic cuff sleeve.


I love shirts and woven fabric tops.
 They're a hardworking part of my year round wardrobe, adding a layer under one of my knits, and paired with my skirts, jeans and pants. I am definitely a seperates kind of woman, that's pretty much my uniform!

Back in 2016, I made a shirt (named the Blosson Season Shirt) with three quarter sleeves finished with an elastic cuff. I loved those sleeves, and while I've toyed with the idea of bringing that design out as a stand alone pattern, I thought perhaps I could find a way to add a longer sleeve to the Box Top pattern.
And, so I did!
With no extra pattern pieces required for the base pattern, here are the instructions to add this sleeve to your hardworking Box Top design!

If you've already tried the Cuff Sleeve pattern hack, then we follow most of the same steps for this hack, so you're already half way there in knowledge!

Ready?

The first step is to cut 2 sleeve pieces to the measurements as follows - 
Size xs/s - 30cm x 51cm
Size s/m - 30cm x 49cm
Size l/xl - 30cm x 48cm
You can make your sleeves longer or shorter for your personal preference, a good guide is to measure a sleeve from a garment from your wardrobe from where the sleeve joins the garment at the underarm down to the hem. In this hack, the 30cm measurement is the length from the sleeve seam to the sleeve cuff.
As we did for the cuff sleeve pattern hack, the order of sewing construction is going to change from the pattern instructions, so we'll begin here...
1.  Join your top at the shoulder seams, finish those seams together (both seam allowances together) either with an overlocker, or with a small zigzag stitch, and press towards the back of your top.

 2. Open out your top so that it's flat on a hard surface. Now take one sleeve piece and pin (right sides together!) the to edge of your sleeve turnback allowance. Repeat for the other sleeve.


Stitch the sleeves to the top with a 5/8th inch (1.5cm) seam allowance. This means that your line of stitching will line up with the side edges of your top. (see here for photos from the cuff sleeve hack)
3. Finish these seams (both seam allowances together) either with an overlocker, or with a small zigzag stitch, and press towards the sleeve piece.


4.  With right sides together, pin down each side and each sleeve. 


5. Using a 5/8th inch (1.5cm) seam allowance, stitch front to back (right sides together!) in one long line of stitching. Pivot at the underarm by leaving your machine needle down, lifting your machine foot, and turning your work 90 degrees to continue.


6. Now carefully clip into the corner of the seam allowance with your scissors. This allows some movement in the fabric so it will sit flat.


7. Now you can finish both edges of this seam allowance, sewing right across the gap created by that clipped corner, either with an overlocker, or with a small zigzag stitch.
8. Well done! Take a break. A cuppa and a biscuit sounds good.
9. Now we're going to finish the raw bottom edge of the sleeve. I've chosen to overlock, but you can use a small zig zag stitch. If you prefer you could turn a very scant 0.5cm narrow hem and just stitch it in place with a straight stitch.
10. Cut two pieces of elastic for your cuffs measuring 30cm each. You might prefer a little looser or a little tighter, so perhaps measure loosely around the widest part of your forearm and take that measurement as the length for cutting.
I used elastic 20mm wide.


11. Now make a circle by overlapping one end of your elastic over the other by a couple of centimetres and pin to secure.


12. Now stitch around the edges of the elastic, making a square around, and then finishing by stitching a line from one corner to the opposite corner.


13. Now comes the fiddly bit, but you'll be fine! Working with your top inside out, slip the circle of elastic over the cuff end of your sleeve.


14. Turn the sleeve end and fold over the elastic so it just covers the elastic width, and pin.
I like to start at the seam.
Continue to fold the sleeve over the elastic and pin, stretching the elastic out as you go.


15. If you have a free arm on your machine, slip the sleeve over this, stretching the elastic to fit.
Sew the sleeve hem with a straight stitch, stretching the elastic towards you as you go.
We'll stitch on the line of the finishing we made to the sleeve earlier - either your overlock stitch, your zig zag stitch, or your narrow hem.


16. Turn your finished top right side out, and voila! You've just added an elastic cuff three quarter sleeve to your Box Top!


Make yourself another cuppa, sit back and admire your work!

Need a pattern to get started?
You can buy one here.


Sunday, February 3, 2019

Those pesky cap sleeves!

Writing my first sewing pattern for the Box Top threw up a head scratching moment for me when I came to document exactly how I construct the cap sleeves for my tops.
I use the same method for all my patterns that have this sleeve as an option, a technique I adapted from a method to create a neat finish for a split hem.
It works beautifully for sleeves, with no need for a tricky, fiddly narrow hem on an armhole, and a finish that is like a self bias once it's topstitched.
I've had feedback from a few of you that you find this bit of my patterns a bit hard to follow - and so I'm really happy to try and simplify the method for you with this tutorial here!
Off we go!

Once you've sewn the side seams for your garment, lay the top (or dress) flat on your ironing board, and lift one side of the sleeve seam allowance - described as the turnback in the pattern.


Now fold in this seam allowance/turnback so the fold lines up with the edges of your side seam.


Press into place, flip your garment, and repeat for the other side.


A tip - when you press around the top of the sleeve opening, try opening out the armhole - the seam allowance at the shoulder should fall into place, so you can just press it down. Make sure your shoulder seam allowances are pressed towards the back!

Now, we repeat these steps again, this time the side seam allowance will open.


Press flat, and pop a few pins in to keep your sleeve hem in place, and now you're ready to topstitch in place.


Sit back and admire your work!


Sunday, January 27, 2019

A tale of two swimsuits

Sometimes I get gripped with an urgent need to make something.
If you're a maker, you might recognise that feeling. 
It's an itch, sometimes bought on by something that you see somewhere, in a magazine, on a blog, on instagram. It starts a train of thought that soon becomes a little obsession. For me, anyway.
My swimmers obsession began with my gorgeous friend-I've-never-met Jane (@lempobee on instagram and co-owner of @thedrapery) in a pair of newly minted self made swimmers (bathers, togs, cozzies, swimsuit - so many terms for the humble bathing costume).
I loved them, and I love following Jane along on her many sewing adventures.
She's kind of my idol for trying new things, and so far I've watched her sew bras, men's jackets, and jeans...all of these things are like the frontiers of sewing for me. Aka, I've never made them.
At this point in a hot January, seeing her magnificent pair of swimmers was enough to spark that obsession for me to try and make my own.
A good part of this desire was also because the pattern she used - The Abigail Swimsuit by OhhhLulu - is exactly the style that I like. A low cut boy leg, a simple cup with no insert or underwire, and a back that I immediately thought I could easily modify to make the swimmers of my dreams. 
Read on if you dare, it's a long story!


We live on the south west coast of Victoria, and we swim at the first sniff of weather warm enough to get wet. My swimmers get a thrashing. 
And like many women, I've settled over the years for 'good enough'. This is something I talk about quite a bit in my
workshops, how sewing can overcome the need to settle for less than perfect when we buy ready to wear. 
Almost the right colour, almost the right cut, if only the back didn't cut in so much, or the leg line was lower/higher/not so tight, etc etc, blah blah, blah. 
So here was my swimsuit sewing carrot! Thank you Jane for being my inspiration.
And here is my swimmers sewing experience.
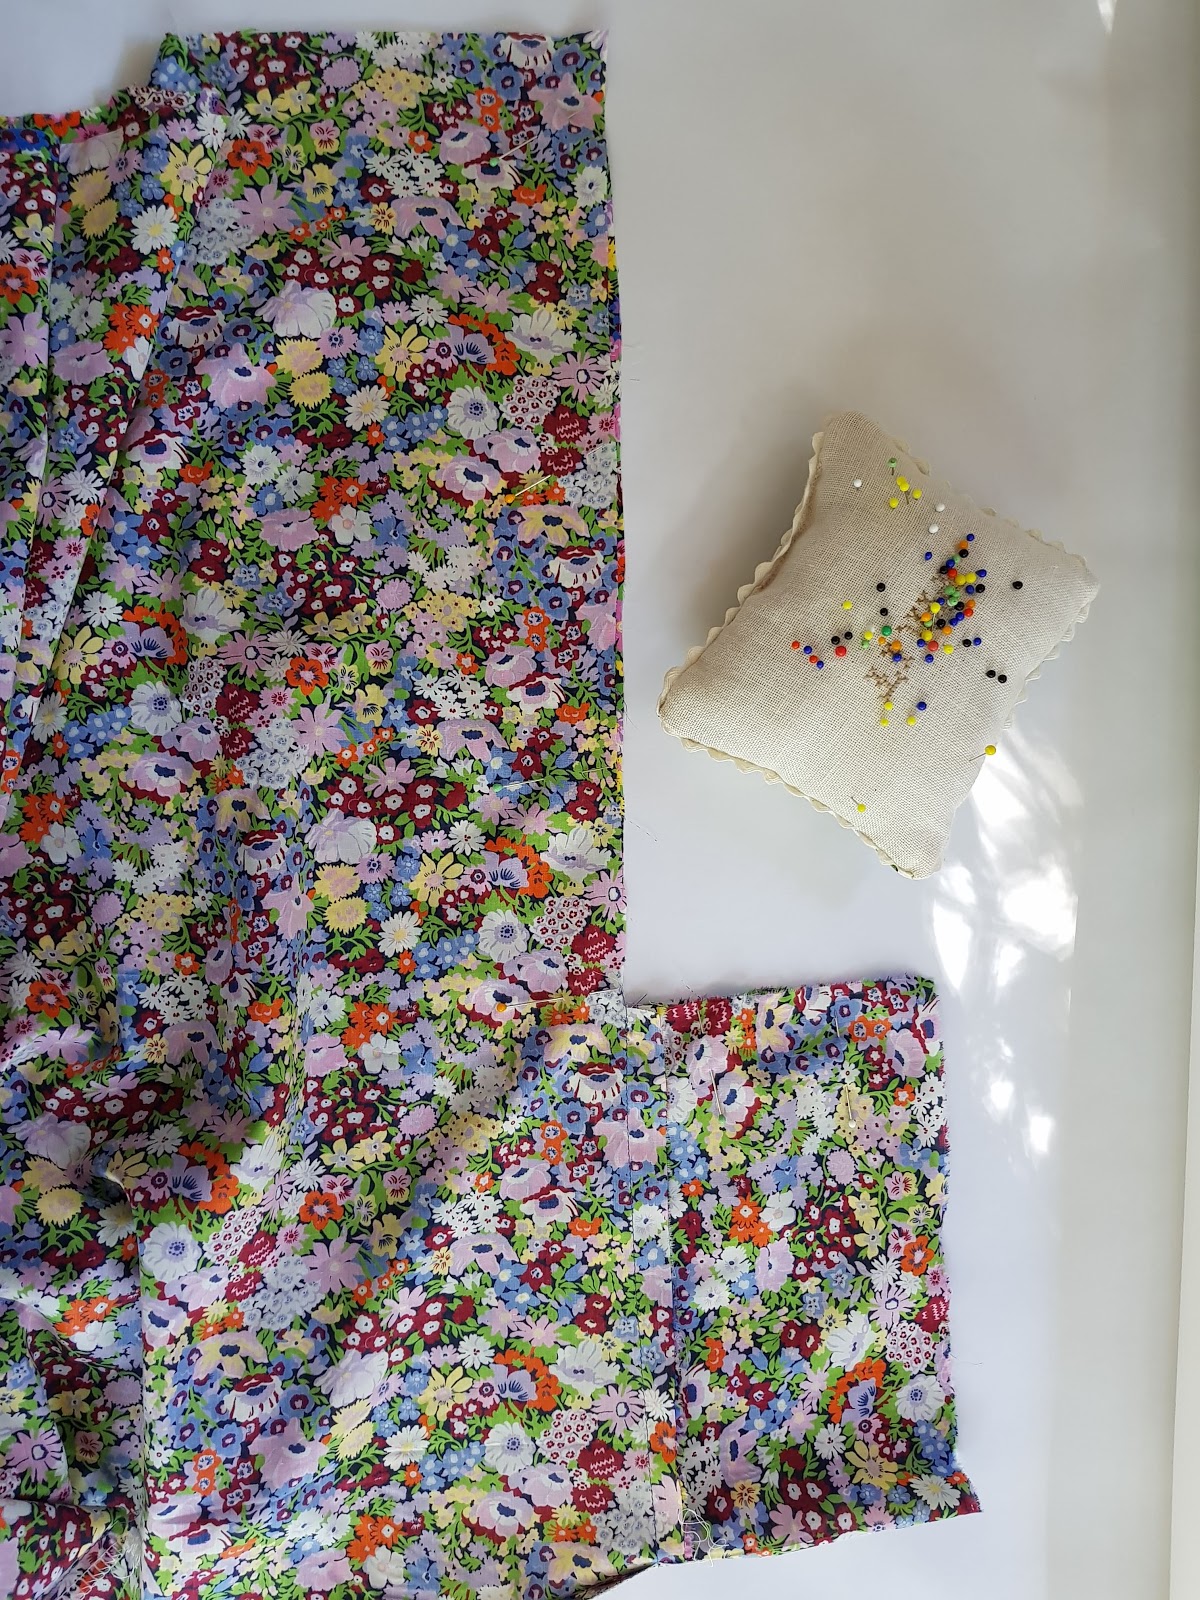
I purchased the pattern via Etsy, and set about gathering my materials. The Drapery is a fabulous source of all sorts of sewing supplies for me, and they were able to supply me with stretch sewing needles for my machine, and some swimsuit elastic.
I bought some glorious Liberty print swim fabric from The Fabric Store, and some special swimsuit lining from The Remnant Warehouse. All arrived in good time, and I was raring to go.
As soon as I cut the pattern pieces, I could see straight away how I could raise the back of the swimsuit by taping the strap piece to the back piece and just cut along the top of the strap, creating a higher coverage back for my bathers.


This meant that I would need to change the order of sewing construction, which was no problem at all.
I began by constructing the cups. Being a generously endowed woman I needed to add a bit extra to the fullness of the cups. After a bit of google research, I decided that to add a half inch to the apex of each cup piece would probably give me enough room, and on first try, they appeared to be fine (more on that later).


You can see that for the half inch I added to the curve, I also added a half inch to the height.

Attaching the cups to the front of the swimsuit first, I could then go ahead and sew up the side seams, and add the elastic across the back, and up each side cup.
So far, so good. I was thrilled with how they were looking!
At this point, I thought I'd try them on for size, and quell horreur! They were miles too short for my body, and quite snug. Even with a good tug, I knew they wouldn't fit up over my bust.
Back to the drawing board.
Lucky for me, the swim fabric, and the lining, were such generous widths, I was able to cut a new pair with a little scrap to spare.
I decided to take a more thorough approach to sizing, and added 3cm to each side seam, even though my measurements originally called for extra width, I'd decided that negative ease (garment measurements smaller than my own body measurements) would be better for stretch fabric used for swimmers. Even though this should be accounted for in the pattern.
I also added an extra 4 inches to the length. I based that extra on the amount the first pair were short of my underbust.
It felt like a lot, but following one of my sewing axioms of 'you can always cut extra length off, but you can't add it on' I went ahead.
Before I added the cups, I pinned the side seams of my swimmers together and (very gently!) tried them on. Length spot on, width too wide.
Easy fixed, I trimmed up the sides by about 2cm, leaving a little extra width to the orginal size extra large.
Pressing on, I completed my new swimmers with no other problems, and was thrilled to try them on to find a pretty good fit.
Except, except...I found the straps too thin to comfortably hold my generous bust as a halter neck. They really needed to be wider.
Also, my cups turned out to be a smidge small. Never a great look.
And so, the sewists best friend, the unpicker, was the only solution. Unpicking is one of those sewing jobs that is tedious at the best of times, but on two way stretch swim fabric, well, let's just say it was a chore, but I was determined to get these right!
 Lucky I had enough scrap to cut an extra pair of cups and lining, and I could add another extra half an inch to the curve of each of the cup pieces - meaning my adjustment for my bust is now an extra inch on both of each cup pieces at the centre seam for a total of 2 inches each individual cup, less seam allowance.
Trying my finished suit on again, I was almost happy to call it done.
Except, except....
This time, the elastic on the inner edge of the cups was wanting to turn outward. I just knew this would bother me more than I would be able to ignore, and so I spent an evening pondering what might be causing the problem.
I looked at lots of photos on the internet of swimsuit sewing, and realised that I probably needed to put my overlocker to use to sew that elastic on. It twigged that I could overlock over the whole width of the elastic, creating a really good firm and flat finish. More (much more) tedious unpicking ensued.
I actually tried this method on the first pair to make sure it would work, and rather than let these almost finished pair go to waste, I decided to finish them completely and find a friend to give them to. Jokingly I say I'll find my Cinderella!
As an aside, if you don't have an overlocker, and you're thinking about doing lots of sewing, I can highly recommend the investment. They are kind of essential for sewing stretch fabric for best results, and provide a beautiful finish for other seams on woven fabric.
I digress...
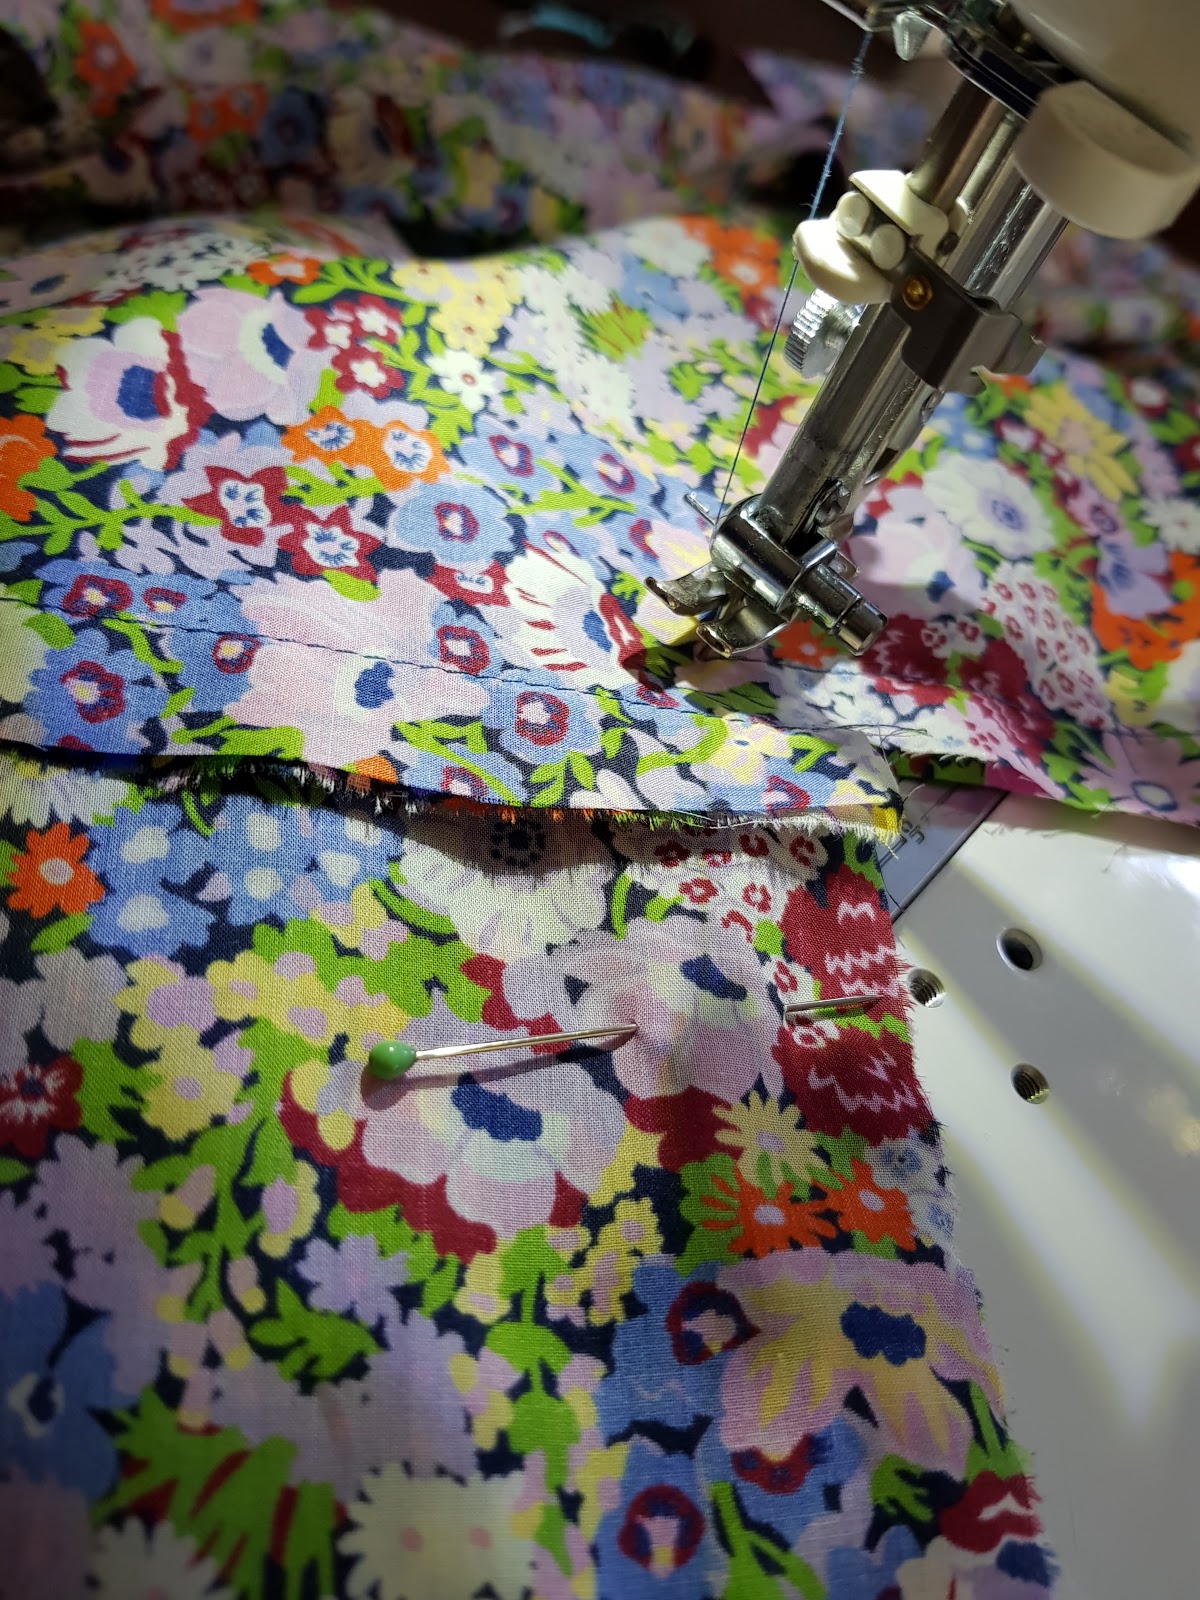
Turning the elastic to the inside of my swimmers and finishing with a zigzag topstitch...and voila! This is the finish I was after!


I eked out some wider straps from the tiny bit of scrap left, sewed them to the cups, tried on my second pair of swimmers, and this time, they are PERFECT. The original straps went to the first pair, and so I have two finished pairs of swimmers, one for me, one for a friend.


I love them, and with a little bit of perseverance, now I know I'll never have to settle for almost good enough again. I'm already looking for more fabric for another pair.

All the details.
Pattern : The Abigail Swimsuit by OhhhLulu
Fabric : Liberty swim from The Fabric Store
Lining : special swimwear lining from The Remnant Warehouse
Swimwear elastic & stretch machine needles : The Drapery

Size : XL
Modifications
 +1cm to side seams
+4inches to length
+1inch to centre seams of cup pieces
wider straps


Tuesday, January 15, 2019

The Box Top pattern hacks. Adding a cuff sleeve.

The Box Top was my very first sewing pattern release, and it's still my most popular pattern.
This simple to make and easy to wear top is the perfect pattern for beginners, if you've sewn a few easy things like a tote bag, or a cushion cover, and you're feeling ready to move on to your first garment, then this is the perfect place to start!
If you have the pattern already, then you might have already tried one of the pattern hacks to make a dress or peplum top, this is an extra that's super easy to do. I promise!
If you'd like to buy a pattern, you can find one at one of my stockists - there's a full list to the left of this post - or buy one online here. Thank you!
I'll cover some of the other techniques like applying bias to the neckline in another post, but here I'll cover adding a cuff to the sleeve to give you a great tee shape. 
Feel ready?
Let's go!


First things first!
You'll need to cut 2 strips of fabric to make your cuffs as follows -
Size xs/s - 15cm x 51cm
Size s/m - 15cm x 49cm
Size l/xl - 15cm x 48cm

We're going to change the order of construction (sewing) from the pattern instructions, so once you have your pattern and fabric cut, and your markings transferred, we'll start sewing here...

1. Join your top at the shoulder seams, finish those seams together (both seam allowances together) either with an overlocker, or with a small zigzag stitch, and press towards the back of your top.


2. Open out your top so that it's flat on a hard surface. Now take one cuff strip and pin (right sides together!) the to edge of your sleeve turnback allowance. Repeat for the other sleeve.


3. Stitch the cuffs to the top with a 5/8th inch (1.5cm) seam allowance. This means that your line of stitching will line up with the side edges of your top.


4. Now press your seam allowance towards the cuff. You don't need to finish this seam because it will be enclosed in the finished cuff.

5. Pin your top front to the top back (right sides together!) up along each side seam and along each cuff sleeve. (apologies for the upside down photo, but you get the idea!)


6. Now in one line of continuous stitching, sew the side seam and the sleeve seam with a 5/8 inch (1.5cm) seam allowance, pivoting where the marking is....important note! the marking IS NOT on the 5/8 inch (1.5cm) allowance, it is placed to mark the point at which you'll pivot. To pivot is to leave the needle in the fabric, lift the sewing machine foot, and turn your fabric around before lowering the machine foot and continuing your sewing. In this case, you will turn your work at a right angle.


7. Now carefully clip into the corner of the seam allowance with your scissors. This allows some movement in the fabric so it will sit flat when turned right side out.


8. Now you can finish both edges of this seam allowance, sewing right across the gap created by that clipped corner, either with an overlocker, or with a small zigzag stitch.


9. Take a breather, we're almost there! Cup of tea? Yes, thanks!
10. Press this side and sleeve seam allowance to back of your top, and then turn in about 0.5cm of the edge of the sleeve and press.

11. Turn the cuff sleeve in so that it just overlaps the seam where you joined the cuff to the top, and press. You might like to put a few pins in to hold the cuff in place, but if you do this, do it from the right side of the top....the reason will be clear in the next step!


12. Turn your top to the right side out. We're going to sew that cuff in place by stitching in the ditch! This means sewing along the line of the seam that joins the cuff to the top, catching the cuff fabric in that stitching on the inside. It's a little fiddly, but go slowly, and use your fingers to feel for the fabric on the inside to make sure you're sewing through all layers. It's a really neat and fuss free finish!


13. Bravo! You've just added a cuff sleeve to your Box Top!
You can now pick up the pattern instructions at the bias neckline, and you'll have a finished top in no time at all.
Make another cuppa, and admire your work!


Need a pattern to get started? You can buy one here.


Monday, January 14, 2019

Hello, how nice to see you again!


Crikey.
Hello, and welcome back, or welcome if you're a new visitor.
It's been a while since I've been here in this space, and to be honest, I'm a bit all at sea!
Where to begin?
Pick up where I left off?
Here we go friends!
Some time ago ....good grief, 2014 can you believe it?...I'd run out of puff here on this blog. I'd discovered the beautiful community of Instagram, a space I still love, and hang out in most days. A space where I've made connections and friendships I could never have imagined. It's been ace.
It had such an impact on my micro business with all the connections and the real time responses and conversations, I jumped ship here, preferring to spend time over there.

So!
With all the many changes that just happen over the course of 4 years, now I find myself shifting focus from designing and making for sale, to designing and making for pattern release.
My patterns so far have been beautifully warmly received (thank you!), and by the end of last year I started to think that perhaps this is the direction I should spend more time on.
I was needing to spend more time on bringing patterns to market, which took me away from bringing actual garments to market...and as is often the case, my days were feeling like a juggling act. I felt like I was a jack of all trades, and master of none!

And now I'd like to use this space in a complimentary way - a place to demonstrate some pattern techniques, to show off new work, to post some handy hints and tips, or however you might like suggest I use it.
Let's go for it!

I'll still be making garments for sale, I'm just going to do that as my sideline, rather than the patterns as a sideline. For all you lovely people who've bought a garment from me in the past, I really hope I'll still be able to make something you'll love to buy and wear in the future too.

January is a grand month for a little sidestep, and feels like the perfect time to be back here too.
Let's see where the year takes us.

Jo x.


Monday, October 27, 2014

Moving house

You might have noticed a little lack of action in this space!
Yes, the crowded world of social media has found me spending more time elsewhere.
And so, after quite a few months of sporadic posts I'm taking the plunge to move on permanently from here.

You can keep up with all my latest Frankie & Ray news over on Facebook.

Upcoming market dates can be found under the Upcoming Markets and Events page of my online store.

And, not least, you can get a little peek into all the behind the scenes work in progress and my day to day life on Instagram.

See you over there, and thanks for stopping here along the way!

Thursday, August 7, 2014

And another....


Hurrah! It's almost the weekend again, and that means another market for me.
This market is a true community fundraising effort, and has the best food, great hours, lots of things to keep the kids busy and happy, and you can come and enjoy dinner and a wine too.
See you there this Saturday! 

Winter Magic Market
Brunswick North West Primary School
Culloden Street, Brunswick
2pm - 8pm

Wednesday, July 30, 2014

Next up!


This weekend you'll find me back in Geelong for this lovely market.
I love the venue for this one, inside an historic old woolstore made modern and light.
I've been on a bit of a quilting spree, so come and see what all those Liberty scraps have become!


Thursday, June 26, 2014

Travelling north


Winter has certainly arrived here in the last week or two.
We were lashed by a big storm this week, putting our power out for more than a day.
Funny how you can take electricity for granted. 
Thankfully we have a lovely fire, so while we sat in the dim light of candles, and cooked our soup on the bbq, at least we were warm!
Which leads nicely to say how much I'm looking forward to packing a huge amount of stuff into my suitcases for Brisbane Finders Keepers in just over a week.
I'm very excited to be taking Frankie & Ray interstate for the very first time, plus we'll get to stay with friends, and we're adding a couple of days onto the trip for a mini-break up north.
It might just be enough to see me through to Springtime!